Sharing public domain with Tailscale and Internal Network with One-To-One NAT using OPNSense
With Tailscale acting like a secure VPN it makes it easy to access your home devices from anywhere as long as you are connected to the internet. But since Tailscale network gives a different IP compared to the Local Network (LAN/Wifi), we now have to connect using Tailscale IP or Local Network IP depending on whether Tailscale VPN is connected. It makes the matter worse by not being able to install Tailscale in some devices such as TV or IOT devices which means we can only use LAN IP on TVs. With most of the apps using iCloud Sync, it will synchronize settings across iOS devices including Apple TV which may not have Tailscale installed. Since I have multiple devices and it is easier to configure using iPhone/iPad I prefer to have iCloud sync. While we could install Tailscale on the OPNSense router I would like to avoid this so each device has to manually install and auth to Tailscale and uses the person's identity. In order to solve this I wanted to use a public domain so no matter which network I'm in it can always get me the correct IP.
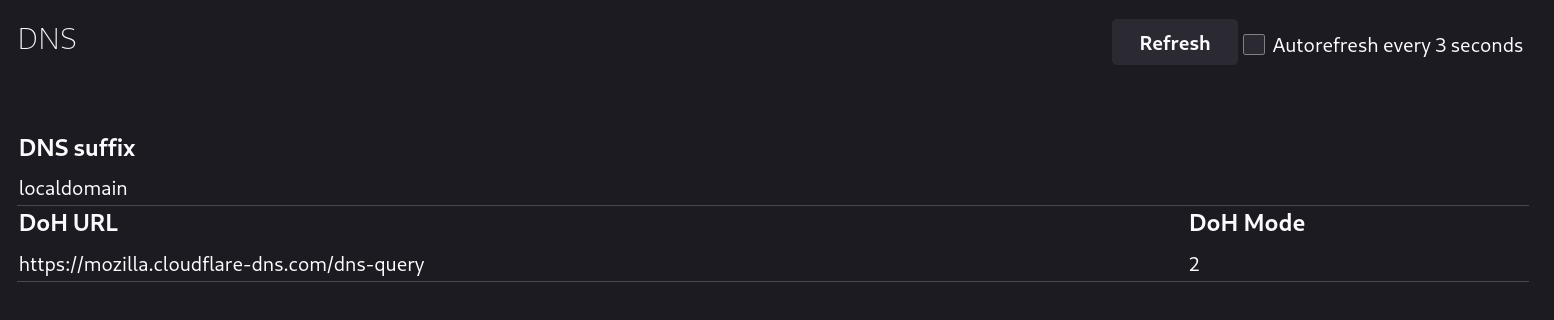
With more browsers, softwares and devices onboarding to DSN over HTTPS (DoH) or DNS over TLS (DoT) it is now harder to override the DNS configurations using the custom DNS server via port 53. You could get arround DoT by blocking 853 port but it is almost impossible to block DoH ince it uses the SSL port 443 unless you go and block all common DoH IPs.
Here is the screenshot of Firefox using CloudFlare's DoH for default installation which can be viewed by opening about:networking#dns.
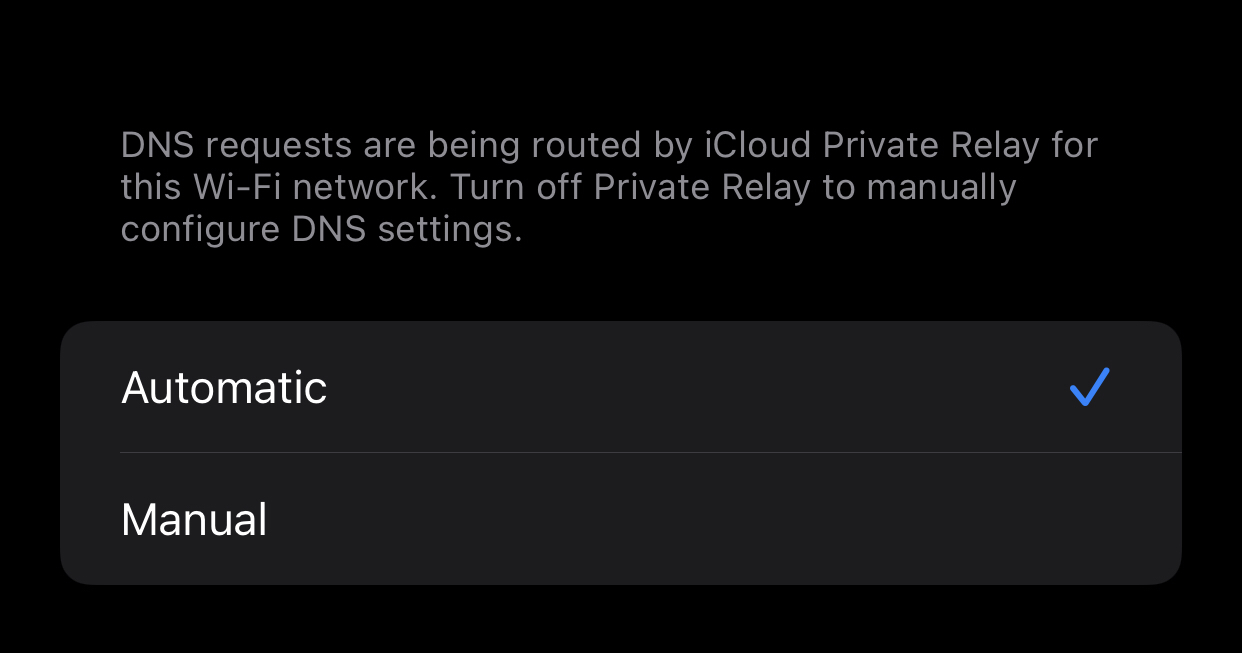
Here is the screenshot of default iPhone's DNS options when connecting via wifi.
Something that was trival few years back is no longer easy and I appreciate we are moving to encrypted DNS which is good for all customers. In order to overcome this we will use One-To-One NAT (Network Address Translation) feature of the OPNSense router.
Register Public Domain
I use a public domain so that in case it never hits my local network DNS by DoH it will still resolve to the correct IP. It also allows me to register a free SSL certs via Let's Encrypt which all browsers and devices can verify.
In this example we will use example.com as the domain and 100.105.10.25 as the device Tailscale IP address that you want to connect to and 192.168.1.20 as the Local Network IP for the same Tailscale IP address.
Add A Record for the domain
Retrieve the Tailscale IP address for the device/server that you want to access via the domain. Add a A record for the domain with the value as the Tailscale IP.
I suggest setting the Time To Live (TTL) value to <= 1min during configuration and testing phase. You can verify the IP is set correctly by using nslookup example.com. It may take several minutes for the DNS to propagate. Some operating system may not contain nslookup command, refer to your OS/distro, for arch linux use pacman -Sy dnsutils
Feel free to add A record for more domains or wildcards as necessary such as *.example.com or nas.example.com. This can also be done in the later phase.
Anyone in the internet querying your domain can see the Tailscale IP address but the actual device will not be accessible by them as it is a private IP. Refer to Tailscale documention for more information on this.
Enable Network Address Translation (NAT) settings in OPNSense
Login to your OPNSense router and go to the Firewall>Settings>Advanced page to enable settings for Network Address Translation (NAT).

While the main option you want to enable is Reflection for 1:1. I suggest enabling Reflection for port forwards and Automatic outbound NAT for Reflection as this will avoid requiring manual creation of other firewal rules as OPNSense will automatically do it for you. You can always change this later and manually add firewall rules as necessary.
Add One-To-One NAT Firewall Rule
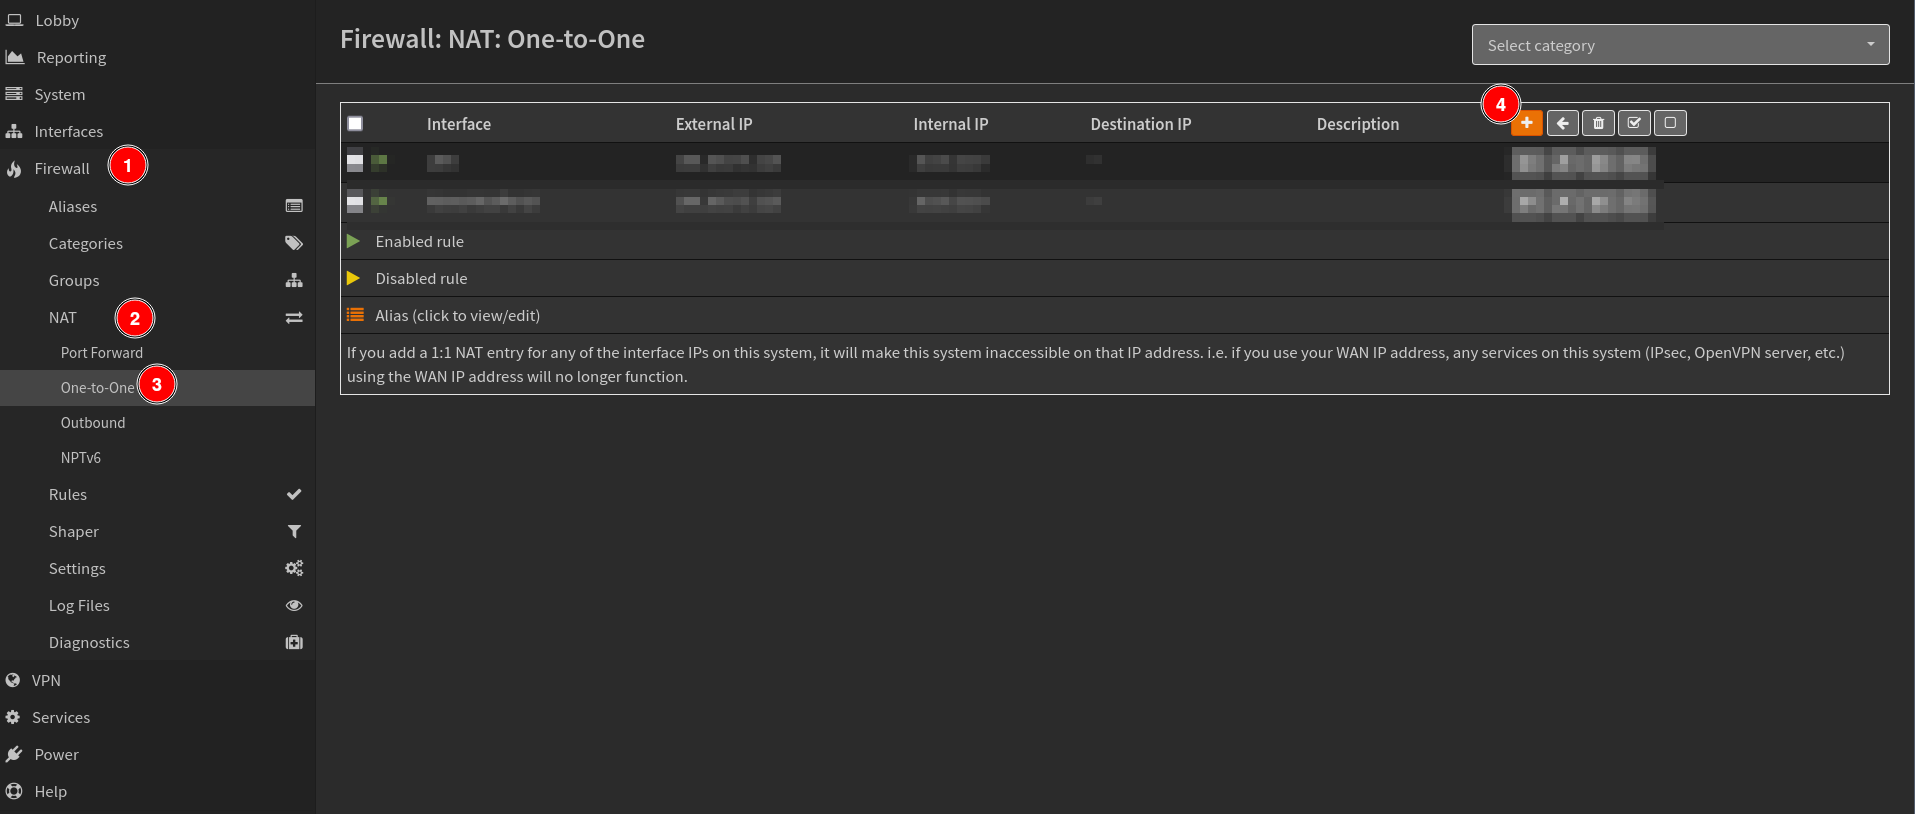
One-To-One NAT allows to translate two IPs. For our case we want to route Tailscale IP (100.105.10.25) to Local IP (192.168.1.20) without leaving the router. For more information on NAT refer to the official OPNSense documentation.
Navigate to Firewall>NAT>One-To-One and click the + sign to add a new rule.
Then set the following rules.
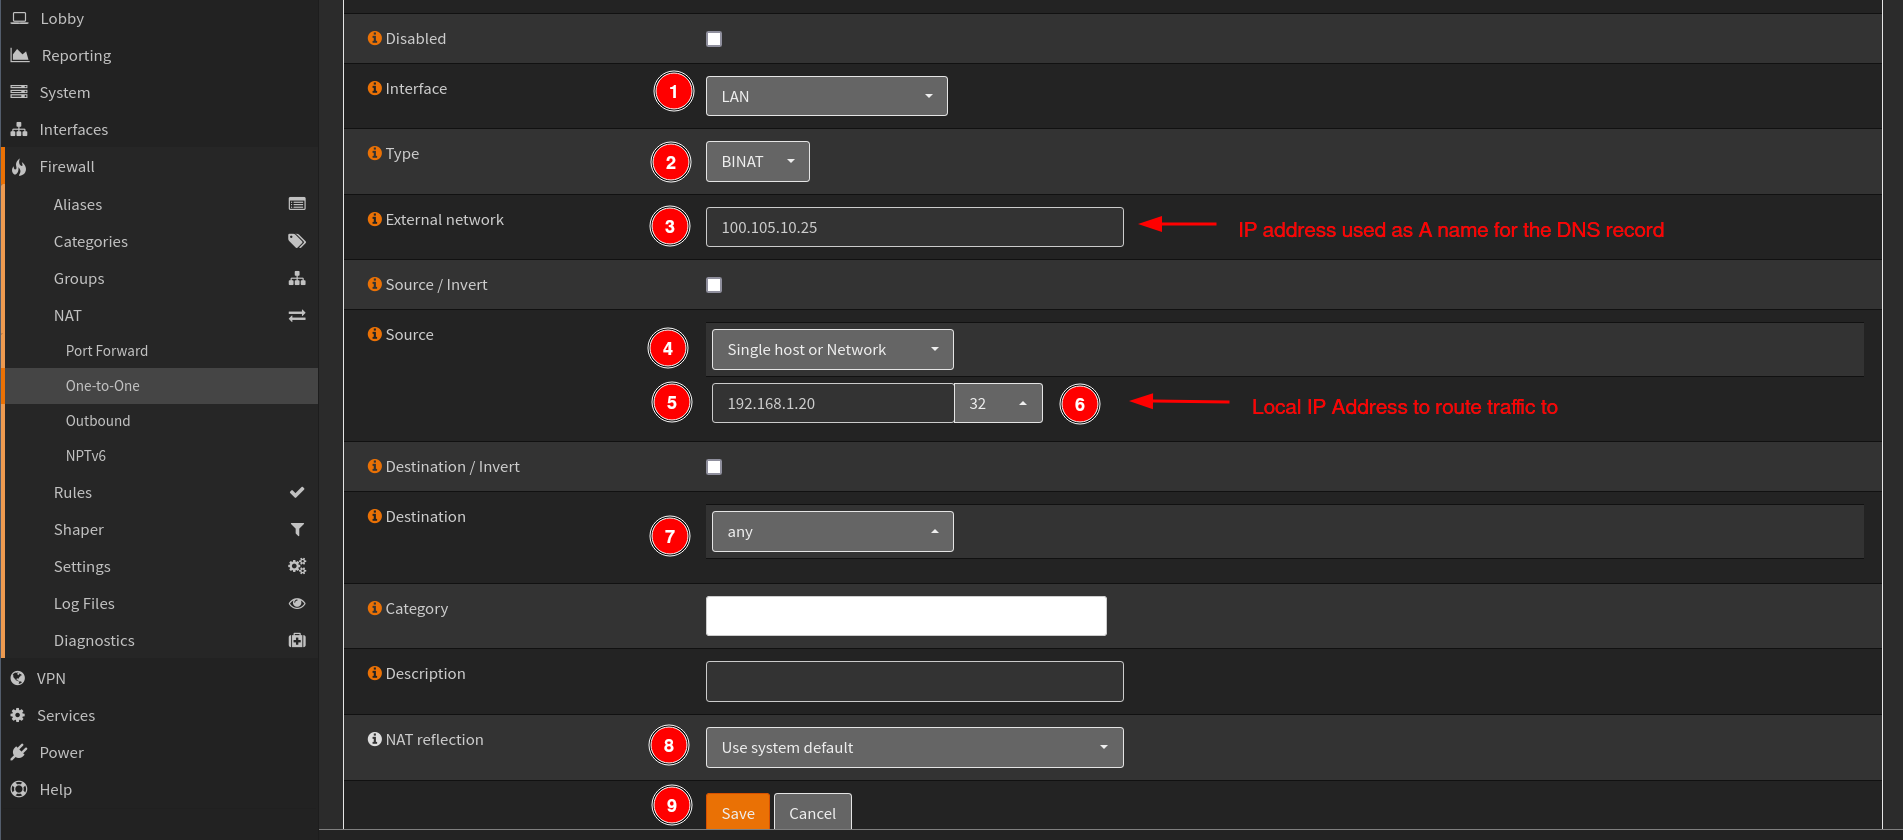
- Select the
Interfaceyou want to enable this for. If you have multiple interface you can clone the same rule and select the new interface. - Select
TypeasBNATwhich stands for Bi-directional Network Address Translation. - Use your Tailscale IP address
100.105.10.25which you set as A name in the DNS record forExternal network. - Select
Single host or Networkwith the Local Network IP192.168.1.20/32as theSource. - Set
Destinationasany - Set
NAT relectionasUse system default. - Click
SaveandApplyto persist changes.
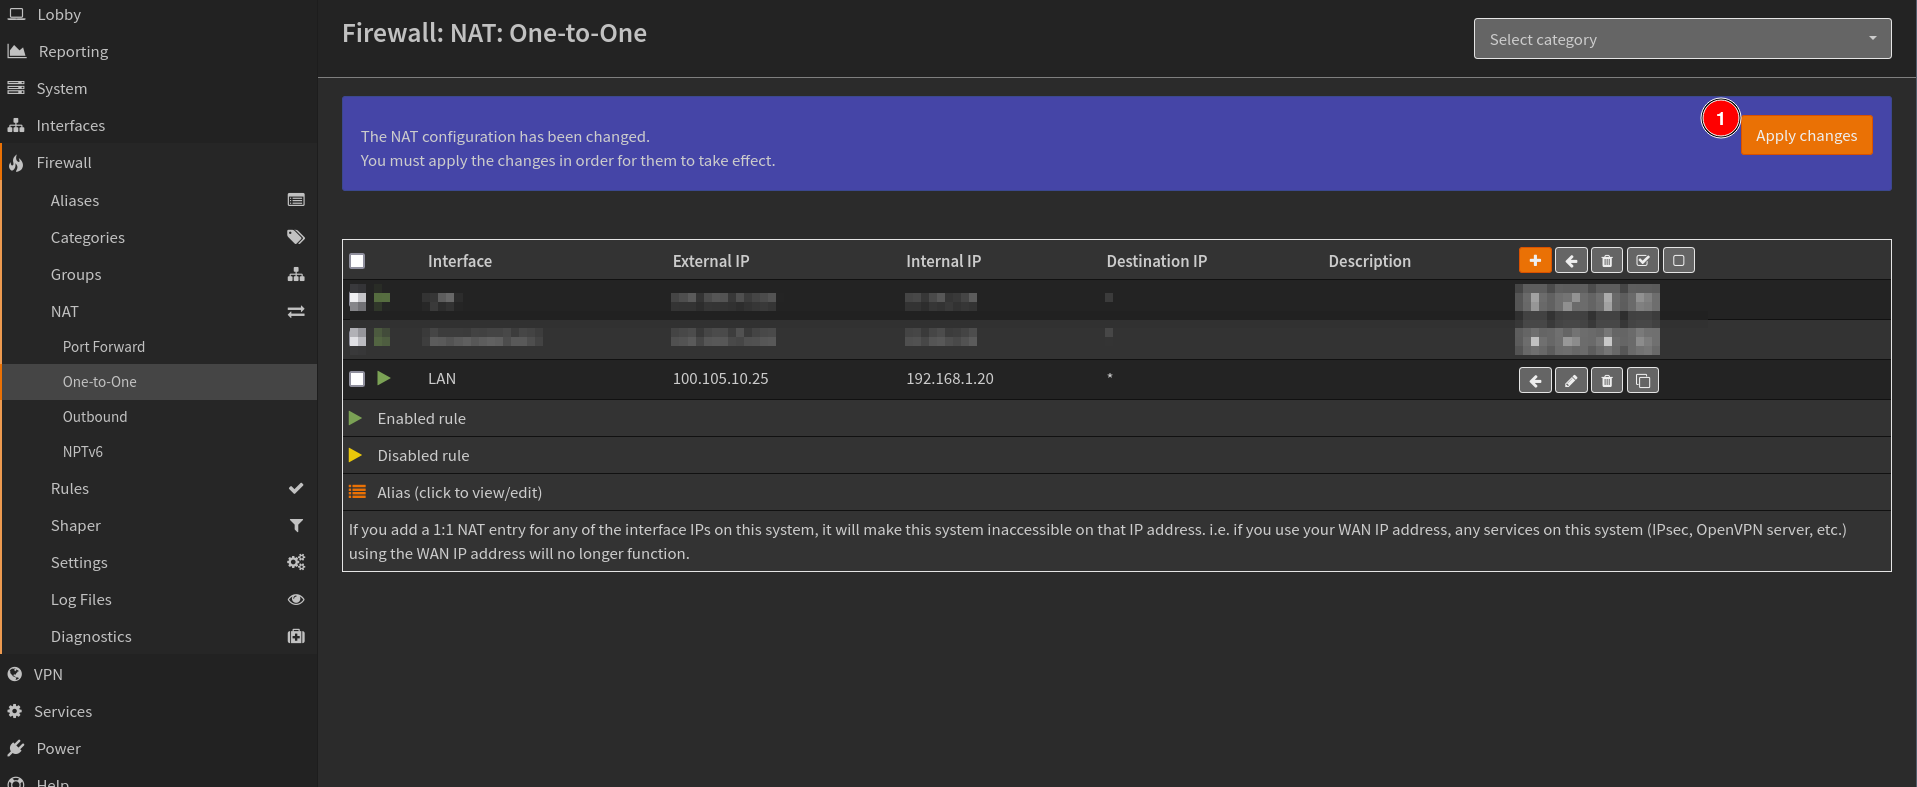
You should now be able to use the domain example.com and access the same device whether you are connected to Tailscale nework or not.